Showing posts with label recipe. Show all posts

May 7, 2013

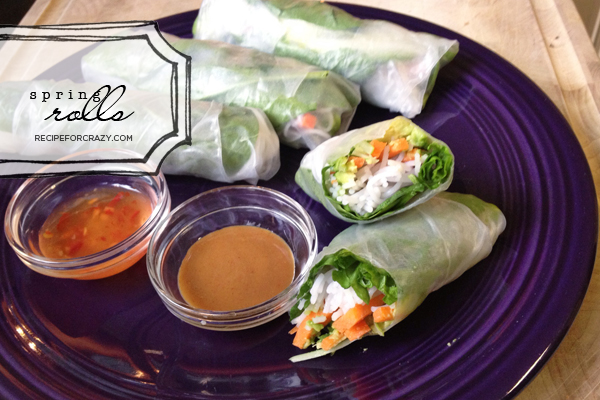
Spring Rolls

Spring rolls by recipeforcrazy

People have asked what how I make mine and what I use to fill them but it's hard for me to answer because I do it differently every time.

It really just depends on what I have on hand but there is a general structure to my rolls.

So for those of you that have asked and are interested in making your own here's what I like: I always start with a fresh herb, some kind of green - bibb lettuce, spinach, bok choy, or romaine have all worked well, carrot sticks because I like a little crunch, green onion and cucumber. Sometimes I'll add thin rice noodles, sometimes bean sprouts. I used avocado in these and loved it. I've also added shrimp and those were amazing.

The possibilities and combinations are endless! Just keep it fresh and it's bound to be tasty - and healthy!

Oh, and for dipping sauces, I like to mix sweet chili sauce with Thai peanut sauce. The Thai peanut sauce gives it a little kick. I bought both at an Asian market and they last forever.

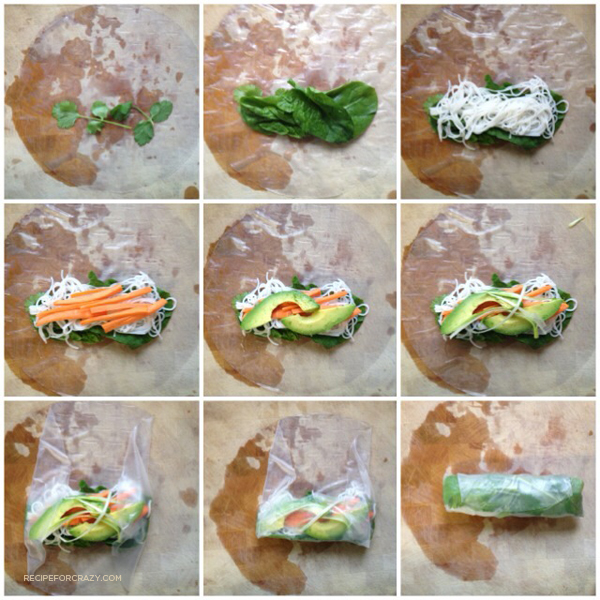
spring roll step-by-step

Here are a few tips I've learned along the way that makes things easier:
  • have everything ready before you get rolling - chop the veggies, make the rice noodles (if you decide to use them) and get everything organized
  • just dip the rice paper in warm water to get it wet - don't soak it. The paper absorbs the water and softens as you fill it 
  • start with your herb (i like cilantro and Thai basil) then top it with the green of your choice, this creates a little pocket to put the remaining filling into which makes it easier to roll in the end 
  • mix it up - try a variety of veggies and herbs to see what you like best
  • just keep rolling - my first attempts were kind of sad looking but the more I make them, the better I get at it and really, it doesn't matter how it looks as long as it tastes good
  • have fun!
Oh, and because I've been asked this too - no, my kids don't eat these. They'll eat just about everything in them, just not rolled up. And the leftover veggies are a great addition to smoothies!

Have a great day!

Mar 25, 2013

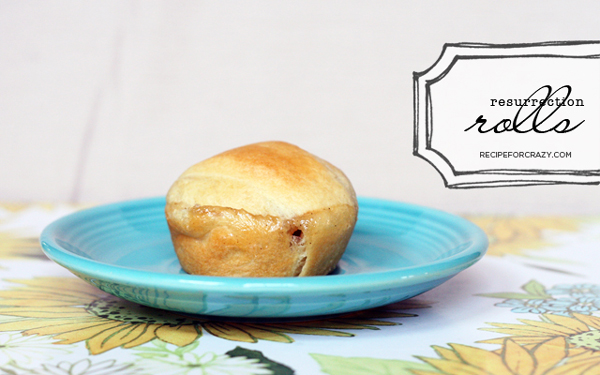
Resurrection Rolls

I posted this recipe last year for Beautifully Rooted and thought it would be a good time to share it here. I hope you enjoy it!

Here's a tasty little Easter treat to make with your family and celebrate the resurrection of Jesus!

Resurrection Rolls

Now, I didn't come up with this "recipe" and, in fact, I didn't know they were called Easter rolls or Resurrection rolls until I someone else told me. See, my husband's grandma makes them for brunch all the time and they are a delicious, easy treat.

My daughter isn't old enough to help out yet, although she sure tried, but these would be great to make with older kids. As you put them together it's an easy way to share the true story of Easter!

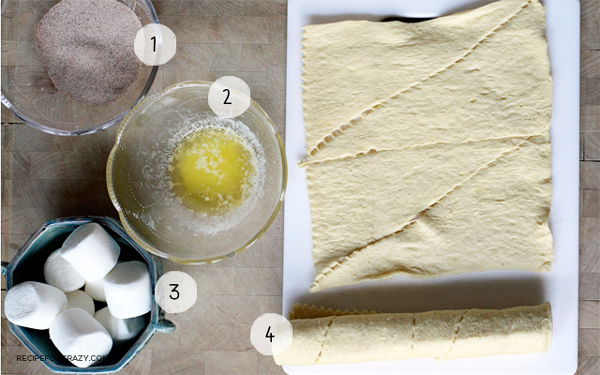
There's only 5 ingredients and they take less than 20 minutes.

Ingredients for Easter Rolls

1. cinnamon and sugar
2. melted butter
3. jumbo marshmallows
4. crescent rolls

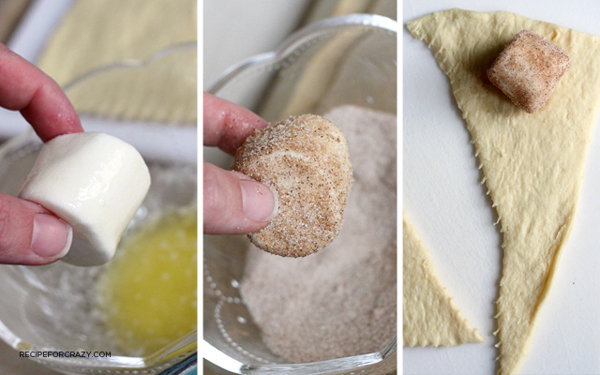
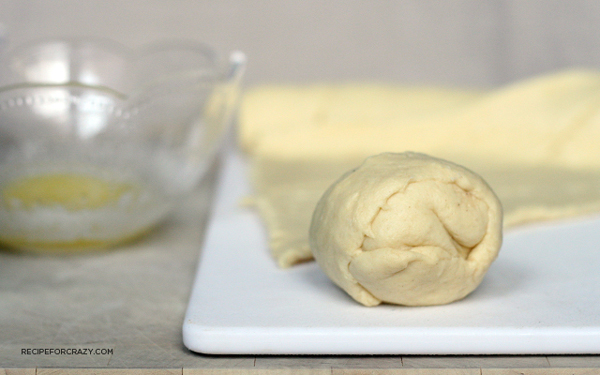
To assemble the rolls, dip the marshmallow in butter, roll it in the cinnamon sugar mixture and wrap it in a crescent roll.

br412-3

As you make them, you can explain use the illustration of the marshmallow being Christ's body, how he was anointed with oils (butter and cinnamon) and placed in a tomb (roll).

br412-4

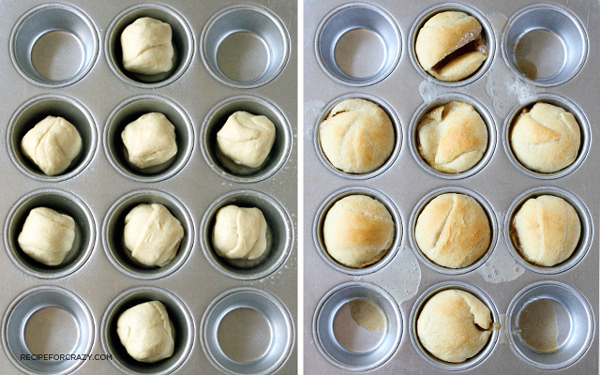
Then each assembled roll in a muffin tin and bake according to the instructions on the tube.

br412-5


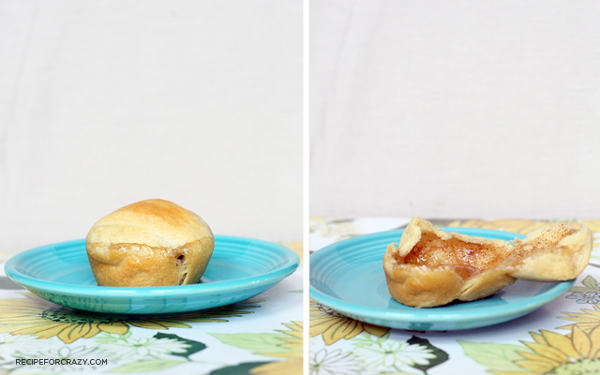
When you open the "tomb" the body of Christ is gone!

br412-6

Happy Easter!

Mar 13, 2013

Perfect Pad Thai

Perfect Pad Thai

It's been a while since I shared a recipe, other than stuff I mix in the Vitamix, ha, but today I have a goody for you, Perfect Pad Thai.

I absolutely love Pad Thai. It's one of my top 5 favorite dishes ever and up until this week, I've always been too intimidated to try making it myself. I mean, have you seen the ingredient list on some of those recipes? And few of those I ever have on hand so I don't mind paying $10 for someone else to make it.

Well, I also started doing this food co-op thing and last time there was an option to get a Thai basket. I immediately knew I'd be making Pad Thai in the near future. So my basket came in and this is what was in it:
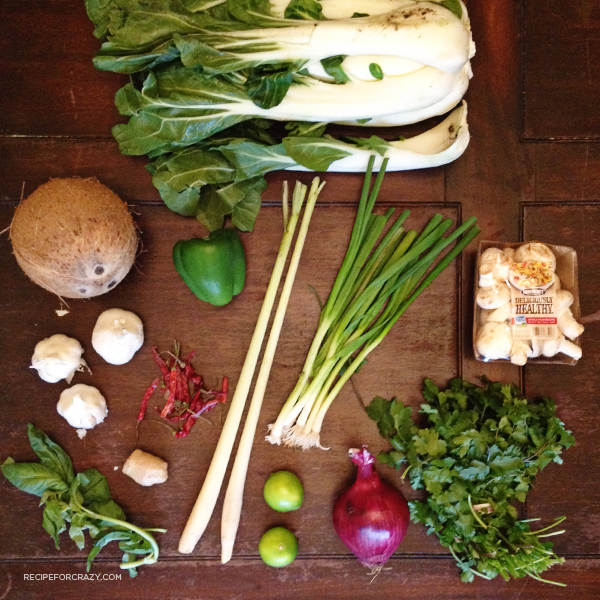
Perfect Pad Thai

All kinds of goodies! So I took to instagram to get some recipes and tips for these ingredients, one of those being how to make Pad Thai.

I'm pretty sure I've mentioned this guy before, but if you like food, want to be inspired to try new ingredients or just be hungry all day by his pictures, follow @omarchris. He amazes me with all the dishes he creates from scratch. Anyway, he emailed me a link to a recipe he uses, you can find it here.

That's what I used for my version, minus a few things. It was so good. Exactly what I was looking for. And one of the best things about this recipe is that it makes a lot of sauce that you can store in the refrigerator up to 3 months. Needless to say, I'll be making Pad Thai a lot in the coming months!!

Like I said, I did a few things different, so here's how I made it.

First I made the tamarind water the day before. Really easy after you find tamarind paste! I found some, along with the remaining ingredients I didn't get in my basket, at an Asian market.

After the tamarind water was made, I went ahead and made the Pad Thai sauce and refrigerated it over night.


The next day I made the rest.

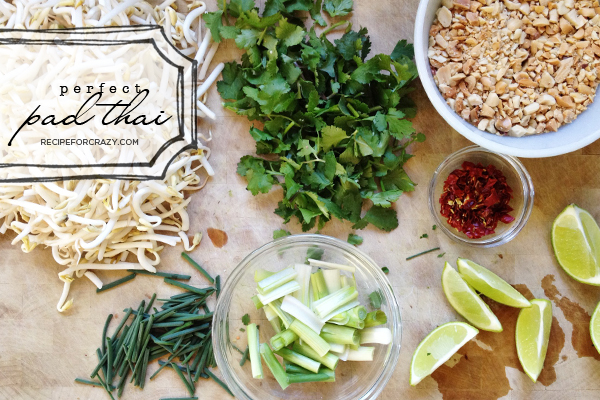
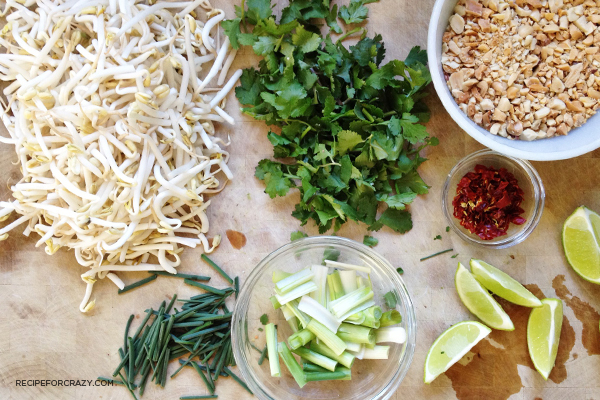
I got all the toppings ready: chopped cilantro, washed some bean sprouts, cut up some green onion, mashed some salted peanuts, and cut the limes.
pdingred2

Then I soaked the rice noodles for 40 minutes or so and got to work.

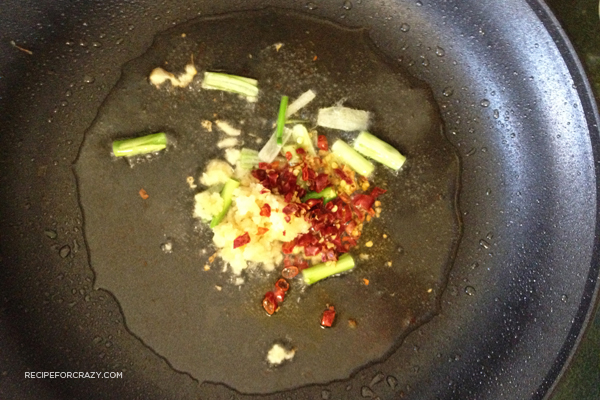
I like chicken in my Pad Thai so I pan fried some sliced chicken and set it aside. Next, I sauteed 5 cloves minced garlic, 5 crushed, dried peppers and some sliced green onion.
pdingred7

You know I like spicy so that's why I added 5 peppers. It had some kick but I'll probably add 7 or so next time. But, if you don't like spicy, you may want to use less.

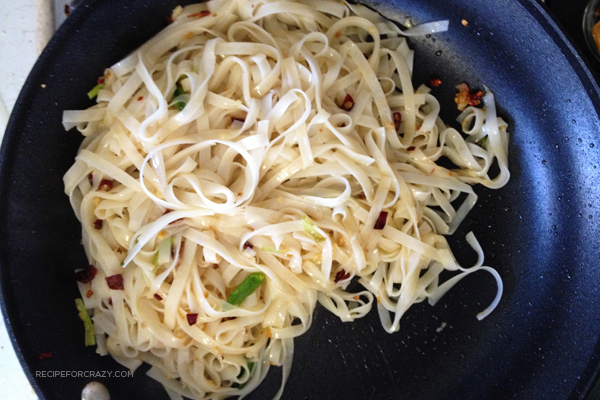
Anyway, then you just add the softened noodles and toss to coat.
Perfect Pad Thai

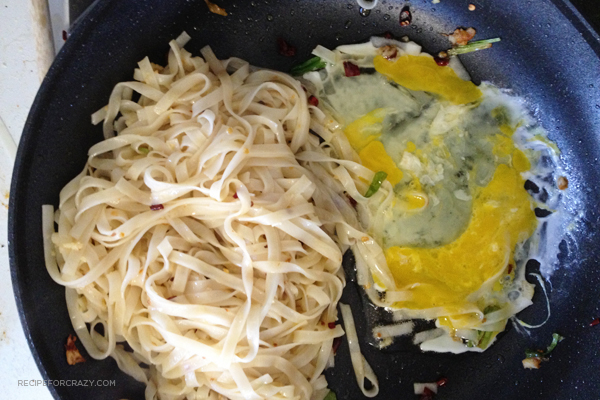
Then I pulled the noodles to the side and cooked an egg, the recipe calls for 3 eggs but I just did one. I felt all fancy at this point.
Perfect Pad Thai

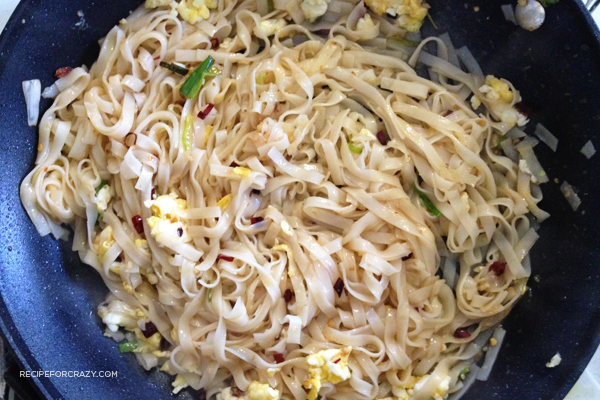
Once the egg was set I broke it up and tossed it with the rice. Then add the Pad Thai sauce. The recipe calls for 8 tablespoons but I ended up using about 12. I like the sauce.
Perfect Pad Thai

Toss to coat and continue cooking until the noodles are to your liking. Then add some of the peanuts, bean sprouts and chicken and toss to coat.

Now it's time to top it!

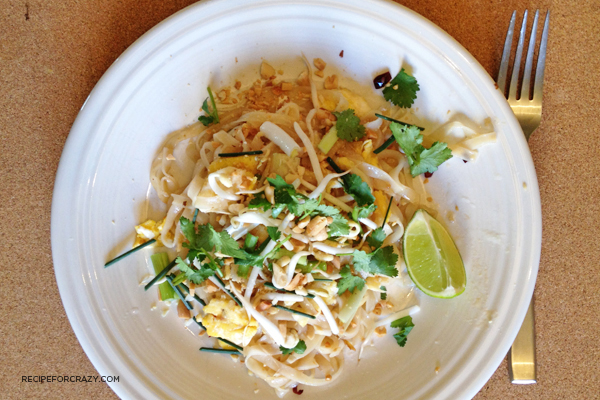
I love lime juice, cilantro, sliced green onion, a little fresh bean sprouts and a little more crushed peanuts on mine. And what's great about making it at home is you can put as much or little of each as you want. I like more lime than the husband so we each got our own perfect plate of Pad Thai.
Perfect Pad Thai

The only thing I thought was wrong with this recipe was that I said it served 4. I could, and nearly did, eat the entire pan by myself. Next time I'll double the noodles.

So if you want to make my version, adapted from this recipe, here's what you need:

Pad Thai noodles:
  • 1 lb medium Rice Noodles
  • 4 tbsp. vegetable oil or peanut oil
  • 1 cup cooked, sliced chicken
  • 5 cloves garlic, minced
  • 5 green onions, sliced in half then in 1 inch lengths
  • 5 dried whole chili peppers, chopped
  • 1 egg
  • 12 tablespoons Pad Thai Sauce - recipe here
  • 1/2 cup bean sprouts
  • 1/4 cup salted, roasted peanuts, crushed with a mortar and pestle
Toppings:
  • 1/3 cup salted, roasted peanuts, crushed with a mortar and pestle
  • 1 lime, cut into wedges
  • 4 scallions
  • handful of fresh cilantro, roughly chopped
  • 1/2 cup bean sprouts
Enjoy!



Dec 4, 2012

Nutella Ritzies - recipe


I'm sharing a new take on my traditional Ritzie recipe over at scottyboy and katygirl today! Come say hi.

nutritzieintro

If you want the original recipe, here you go.

Dec 3, 2012

party fun!

Happy birthday DAD!!!

Hope you have a great day.

Also, head over to my sister's blog to see how we celebrated our mom's birthday over the weekend.

It was so much fun and Ashley has the perfect party space. I even got a little crafty and made some tassels!

tassels

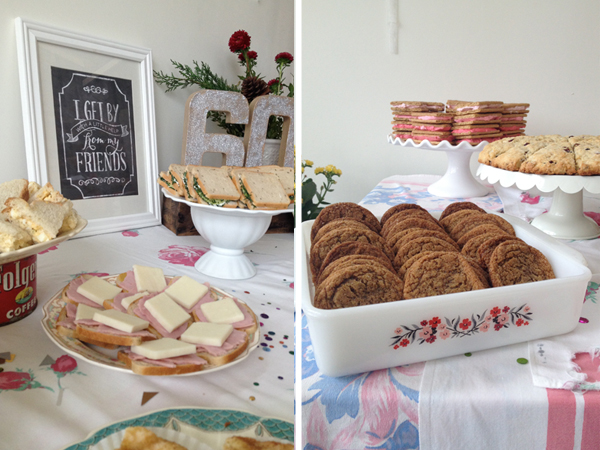
It was a tea brunch, complete with assorted teas and coffee and snacks galore.

I made a few things and if you thinking about having your own tea party, these recipes are tested and approved.

Tea party snacks

Ginger sugar cookies 
Crunchy on the outside and chewy in the middle. I saw them a while back when Hannah posted her recipe and have looked for a reason to make them since. They were so good. Go. Make them now.

Ombre grahams
My sister sent me the link for these from Cookies and Cups. I love how festive they are. My used to make graham crackers with chocolate frosting when we were little. I also used the buttercream icing recipe from Cookies and cups and it was perfect.

Cucumber Tea Sandwiches
I saw these in a book my Aunt got me for Christmas a few years back, Martha Stewart's Hors d'Oeuvres Handbook. Pretty simple, cream cheese and sliced cucumbers on white bread then roll the sides in chopped chives.

Egg Salad Sandwiches
I used this recipe. (updated because I linked to the wrong recipe originally.) It was easy and delicious. I will use this recipe every time.

My sister made the most amazing scones for the party. Maybe we can all convince her to post the recipe!!

Oh, and not a recipe, but did you notice the print in the picture above? 

getbyprint

I designed it for party favors for the guests and now it's in the shop!

And no party is complete without a little pyro fun. The incident involved my child, a candle flame and a Tangled doll. Ashley posted pictures on the blog.

Happy Monday folks!!


Nov 20, 2012

Millionaire Pie - Granny's recipe

Thanksgiving is in two days!!

Today I'm doing the grocery shopping, tomorrow I'll be making a few things in advance (cran-grape compote, deviled eggs and sweet potato casserole) to take to our dinner and then Thursday, I'll be eating.


A lot.


A lot of really good food.


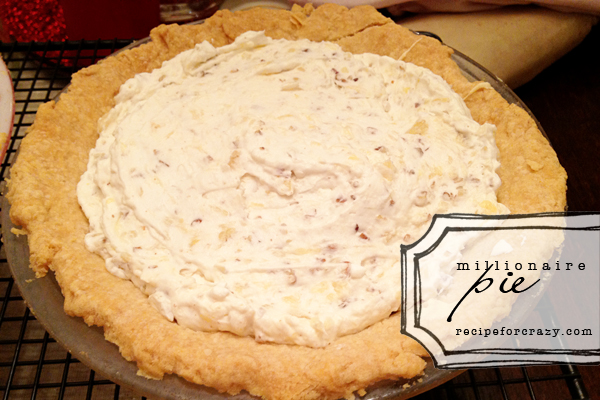
Today I'm sharing a recipe we typically have as a dessert with Christmas dinner but I have been craving it so I'm bringing it to Thanksgiving dinner this year. My grandma used to make these two pies every year and there were never leftovers. I think this pies has a few names but, in our family, we call it Millionaire Pie.

millionairepie

If you've never enjoyed this pie, the ingredients may sound a little odd to you but trust me, it's delicious. Here's what you'll need:

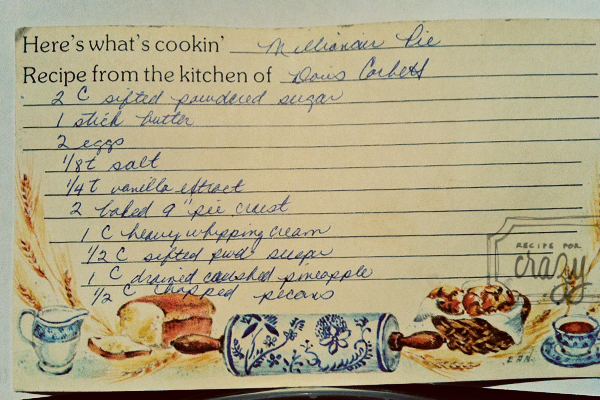
millionpierecipe

I snagged that card from my mom's recipe box a couple of years ago.

Here's a typed out list to make it a little easier for you:
2 baked 9" pie crusts (recipe here)
2 cups sifted powdered sugar
1 stick butter - room temp
2 eggs
1/8 teaspoon salt
1/4 teaspoon vanilla extract
1 cup heavy whipping cream
1/2 cup sifted powdered sugar
1 cup crushed pineapple, drained
1/2 cup chopped pecans

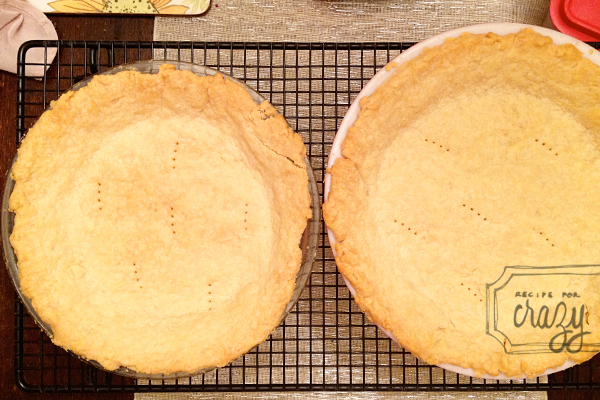
First you need to bake your pie crusts. This recipe makes two pies, hence the 2 baked pie crusts. You can find grandma's pie dough recipe here. Let them cool completely.

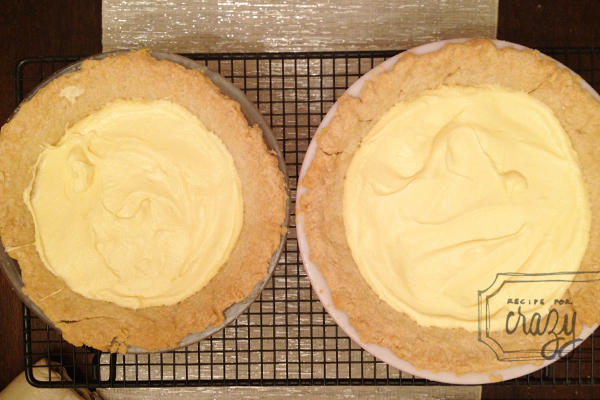
millionpie

Then it's time to make the filling. There are two layers of fillings so we'll start with the first for obvious reasons.

Cream 2 cups powdered sugar and a stick of butter in a tabletop mixer. Then add the eggs, salt and vanilla and beat until fluffy. Divide the filling between the two crusts and refrigerate until chilled.

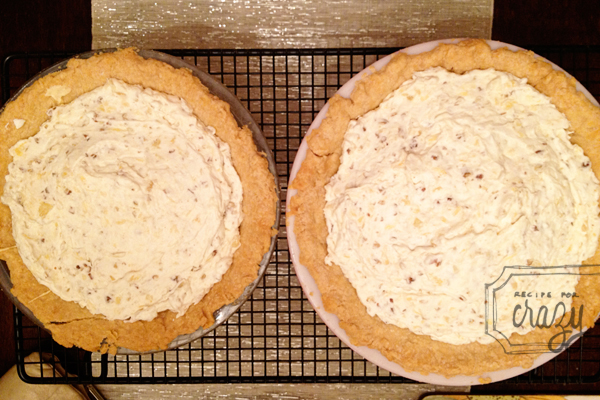
millionpie2

Then, whip the cup of cream until stiff. Blend in the sugar. Fold in the pineapple and pecans. Divide this between the two pies and spread over the pies. Chill and serve.

millionpie3

Enjoy!
Oh, and you may want to stop by Thursday for a special black Friday code for my shop :)


Nov 6, 2012

Roasted Pumpkin Soup - recipe


Roasted Pumpkin Soup

If you read my post at Beautifully Rooted yesterday, you found out a little secret about me. For those of you that didn't catch it, I don't like pumpkin.

I don't want pumpkin in my pie, cookies, coffee, cream, cupcakes, donuts, bread or - and I might cause the internets to crash on this one - my latte.

I'm sure I lost of few friends on that last one but seriously, folks, I just don't care for it. More power to all you pumpkin lovers out there! You don't have to worry about me cutting down your beloved PSL supply at sbux. I'll stick to my trusted plain jane, vanilla latte.

Now that I've lost some of you completely! I will say that I love, love, love pumpkin soup. I think it has to be the savory side of it that gets me.

So, this year while the husband and oldest daughter were carving on their pumpkins, I took a knife to mine to prepare homemade soup.

This was my first time making pumpkin soup and I knew I wanted a soup without a lot of frills so we could really taste the pumpkin and I wanted it creamy. I found these two recipes and kind of did my own take on them, this one from my pal Martha and this one found on easy peasy food.

I'll stop blabbing and tell you how I made it.

First, you'll need:
a smallish pumpkin - i didn't weigh it but it was probably a five-pounder
1 onion - quartered
2 cloves of garlic
1 quart chicken stock - homemade, canned or boxed works just fine
2 cups heavy cream
salt and pepper

Optional topping ideas:
chives - roughly chopped
fried shallot or onions - sliced
croutons - made from crusty, rustic bread which is also good for dipping!
crumbled bacon

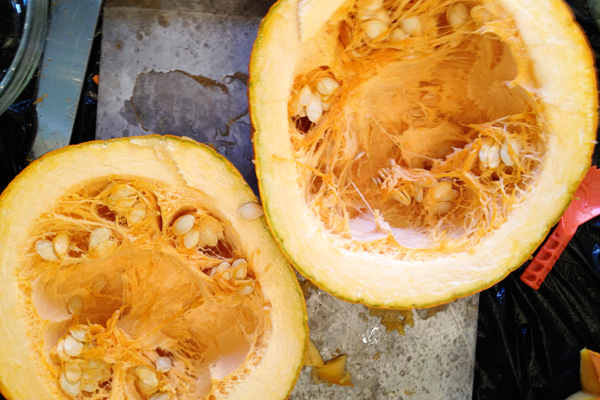
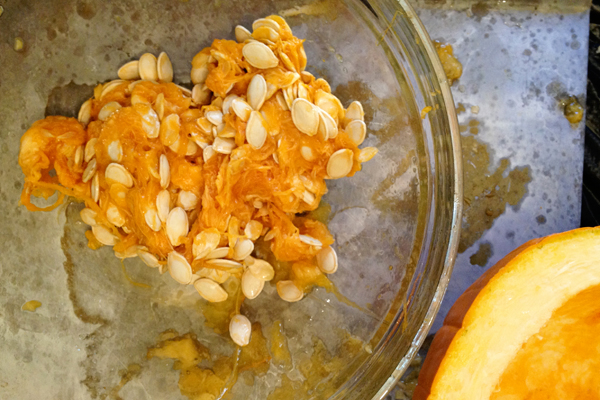
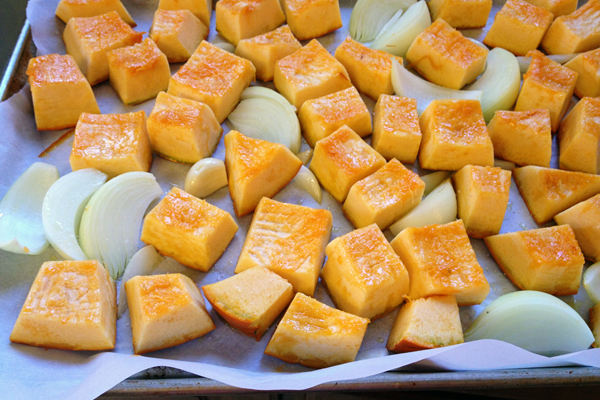
Cut a small pumpkin in half. Scoop out the seeds and chop it into smaller chunks.

psoup1
psoup2
psoup3

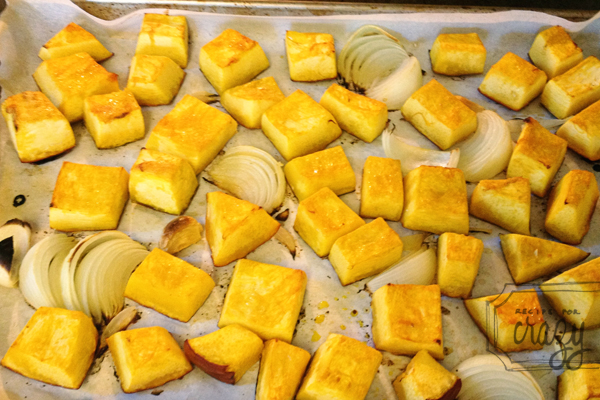
Lay the chopped pumpkin pieces on a cookie sheet lined with parchment paper, add the garlic and onion wedges and toss with about 1-2 tablespoons extra virgin olive oil. Then season with salt and pepper and roast in the oven at 450 degrees for about 30 minutes, or until tender and the onions start to brown.

Roasted pumpkins and onions

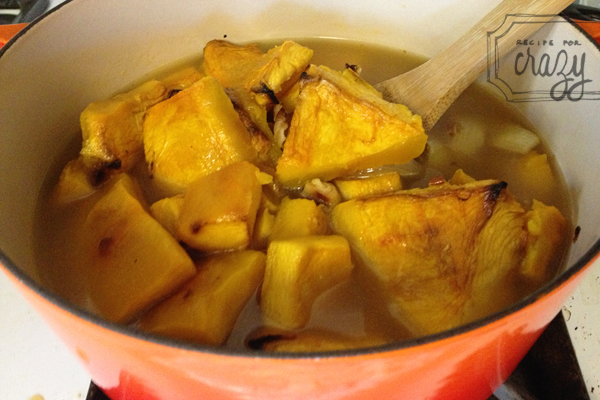
Trim the peel of the pumpkin and transfer everything to a large pot and add the chicken stock.

pumpkin soup in the works

Bring it to a boil then reduce the heat until it's simmering and let it simmer for about 10 minutes.

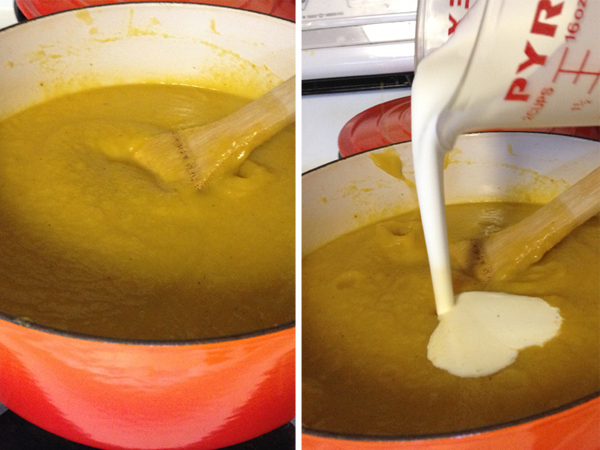
If you have one of those fancy immersion blenders, stick it in there and blend it all until it's nice and smooth. If you don't, like me, transfer it into a blender and blend until smooth and return to the pot. I had to do several batches to get it all.

psoup7

Then add the cream, stir and serve.

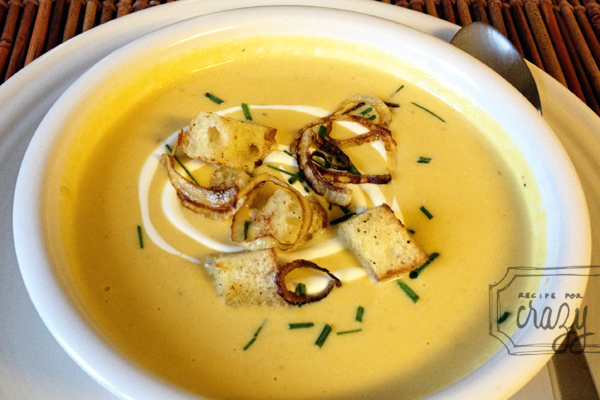
We served ours with fresh croutons, fried onions and chives on top, which I highly recommend. I only wish I made more croutons. So much better than just dipping your bread!

Croutons

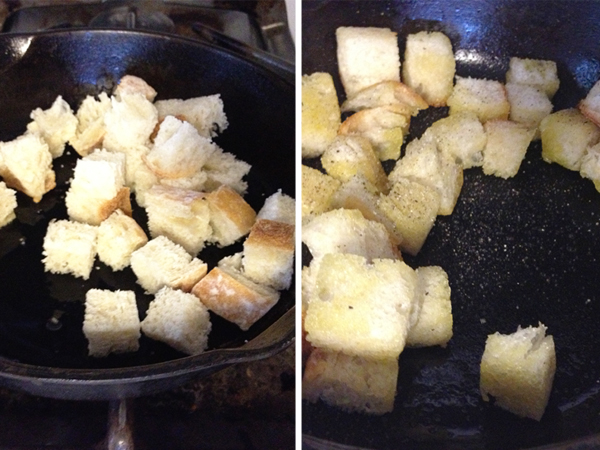
If you want to make some croutons, it's super easy, just cut some fresh, rustic bread into large cubes. Heat a little evoo in a skillet on medium and add the bread. I actually fried some sliced onions first and just added a little more oil. Anyway, toss the bread around to coat and season with salt and pepper. Stir every now and then so the bread doesn't burn but gets nice and toasty. Then top your soup!

Roasted Pumpkin Soup

Sep 24, 2012

Banana-Sweet Potato Donuts - recipe

Banana-Sweet Potato Donuts

Can you think of a better way to start off a Monday morning than with a donut? Even better, a healthy donut!! For those of you that have been waiting for me to share this recipe, wait no longer.

Get on over to BeautifullyRooted.com to see the post.

I don't want to spoil the surprise, but, there a healthy-muffin-version to go alongside the less-than-healthy donuts!

Sep 6, 2012

Game Day Cookies!!!

Do you remember when I posted the recipe for these cookies?

thumbprint5

They were quite a hit around here and it seems they were a hit on pinterest too!

That's pretty cool when you see one of your own recipes on pinterest!!

Anyway, these cookies were taken to a whole new level. Sweet Melissa, over at Midwest Magnolia, made her own version of the cookies for game day. They are so awesome!! Check out her post today to see what she did. I think I'll be doing my own version for game day this fall.

Thanks for sharing your cookies, Melissa!!

Aug 14, 2012

Tabbouleh

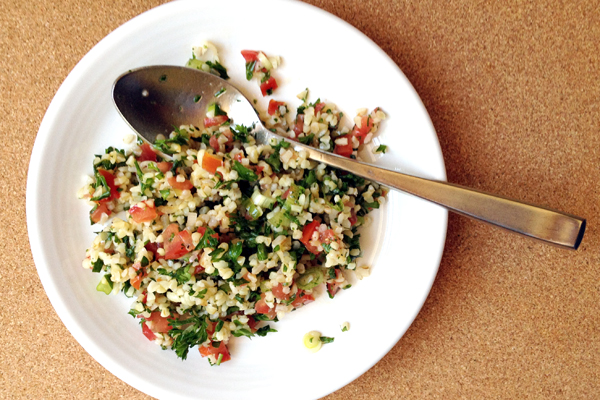
Tabbouleh is up there on my list of favorite summer dishes. Usually we have fresh parsley, tomatoes and onions from the garden but sadly, the extreme summer heat has taken a toll on our garden so I bought everything at the store. *gasp*

Years ago I found this Martha Stewart recipe and have since adapted it to suit our tastes. We like a lot of parsley and a lot of lemon so if those aren't your thing, go by the recipe. This recipe calls for burlgur wheat and although most grocery stores don't carry it, if you can find it, it makes all the difference. Thankfully the store near my house started carrying it in bulk so I'm always stocked now!

Anyway, on to the recipe!

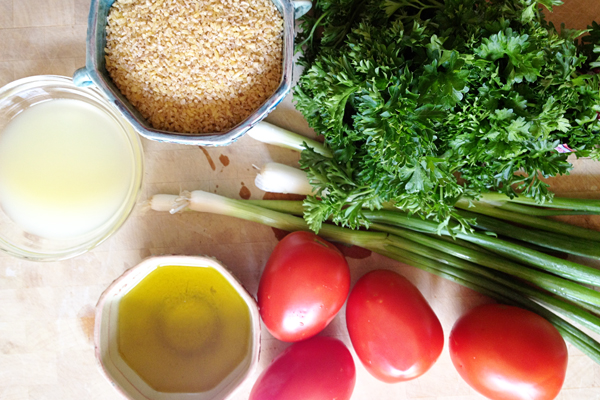
Here's what you'll need:

tabbouleh
  • 1 cup bulgur wheat
  • 4 plum tomatoes, seeds removed and finely chopped
  • 1 bunch finely chopped parsley
  • 6 green onions, finely chopped
  • 1/2 cup fresh lemon juice
  • 3/4 teaspoon coarse salt
  • 1/4 cup extra-virgin olive oil
  • Freshly ground pepper
First you need to soak the bulgur. Just put it in a bowl with 2 cups water and let it sit while you chop everything. It takes about 15-20 minutes to get tender.

Drain the remaining water off the bulgur and put in a bowl. Stir in the olive oil, lemon juice and salt and pepper. Then stir in the tomatoes and onions, followed by the parsley.

Cover the bowl and refrigerate at least two hours but it's always better the following day.

tabbouleh2

Eat and enjoy!
Jul 23, 2012

Greek Chicken with Roasted Okra - recipe

I shared a picture of this meal on instagram and had a couple people ask for the recipe so here it is.

greekchicken

The husband requested Greek chicken the other night and I didn't want to go to the store so I had to use what we hand on hand. I found this recipe for Greek chicken adapted it to fit our tastes.

I had 6 boneless, skinless chicken thighs in the fridge and marinated them over night (marinade recipe below).

Marinade:
1/4 cup lemon juice
1/2 cup olive oil
1 tablespoon basil
1 tablespoon oregano
1 teaspoon fresh oregano
1/4 teaspoon thyme
3 cloves minced garlic
salt and pepper

Just whisk it all together in a bowl and pour it over chicken in a gallon freezer bag.

So it marinated over night and the next day I put the thighs in a baking dish and tried to save as much of the marinade as I could and spread it over the meat. I baked them for 30 minutes then turned the broiler to high and cooked them another 5 minutes, or so, until the skins started to get brown and crisp.

As for the okra, I had picked several pods from the garden and an instagram friend (@omarchris - he makes the most delicious food) suggested I roast them. I've never had roasted okra so I had to try it! Turns out it is super simple to make and so very delicious. Now, I do love me some fried okra but I've had plenty of that already this year and the roasted was a nice change.
Anyway, for the okra. I cut the stems off each pod and cut them in half vertically and spread them out on a cookie sheet. Then I drizzled them with olive oil and seasoned them with salt and pepper and baked them at 400 degrees for about 20 minutes or so, until they started to get a little black in places.

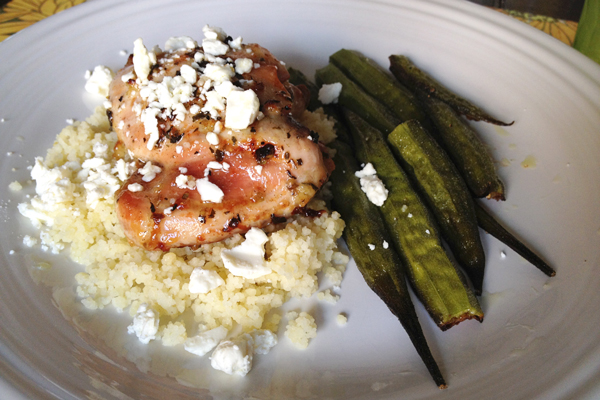
I served the chicken (topped with a little crumbled feta) over couscous alongside the okra and it was one of my husband's favorite meals.

I'm making it again this week but am attempting to make it with a whole chicken in a crock pot. I'll let you know how it turns out.

Anyway, have you ever had roasted okra?


Jul 19, 2012

Canning Adventures Part 1 - Salsa

Canned Garden Salsa

Every year my husband plants way too many tomato plants than we could ever need. In past years we have given the excess to neighbors and co-workers but this year we decided to try a few canning recipes for our tomatoes. I've never canned in my life and was surprised at how easy is was.

Easy, yes.

Quick, no.

Canning takes time and a whole lot of it. First there's the prep work. Cleaning, chopping ingredients and sanitizing EVERYTHING. Then there's the cooking time, processing time and my least favorite part, the clean up. It's pretty much a whole day affair.

That said, it's also pretty fun. I have since canned a variety of things that I'll share over the next few weeks but I'll start with my first adventure: salsa.

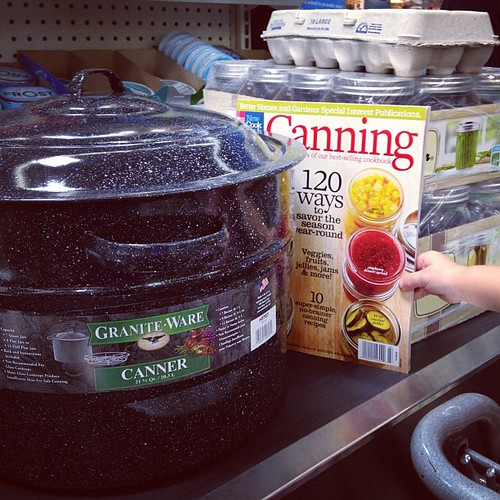
I went to the store and got a few canning essentials. 

canning basics 

A water canner, plenty of jars and a handy little canning cook book.

And this is how it all went down.

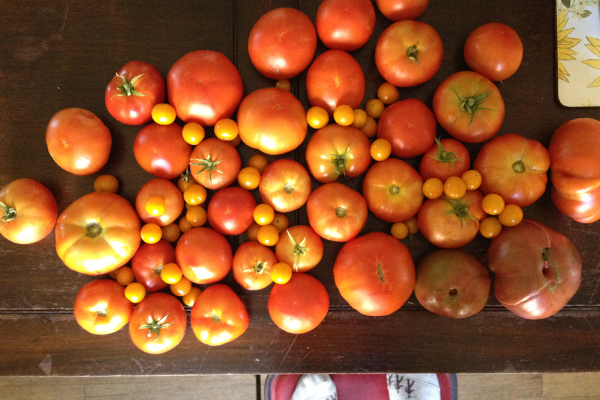
Main ingredient: tomatoes picked from the garden. 

a day's garden harvest

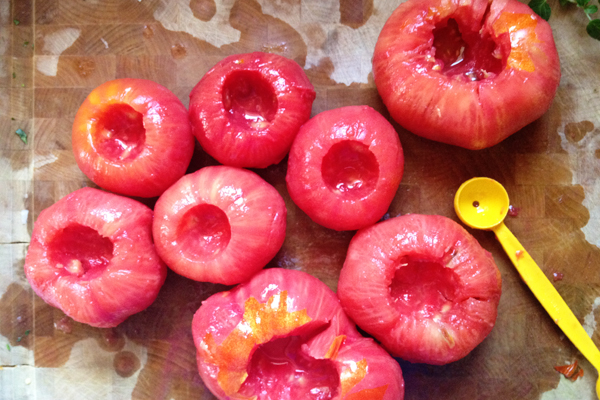
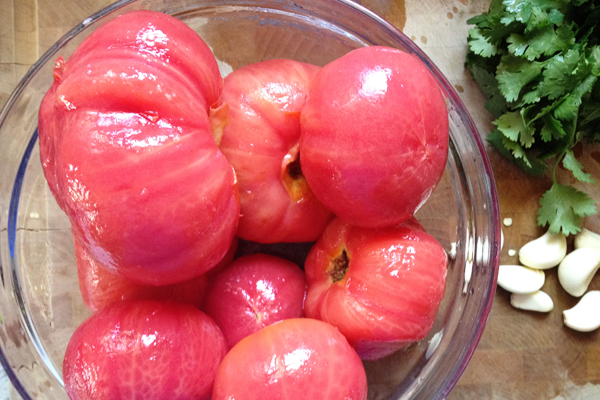
I had to blanch like 12 pounds of those bad boys before coring and taking most of the seeds out. Side note, I never blanched anything before and was amazed how fast and easy it was. The skins peeled off without much effort. 

blanched tomatoes

Anyway, time to remove the cores. I didn't have a fancy corer so I improvised and just used a melon baller. You can call me a genius, I don't mind. 

coring tomatoes with melon baller

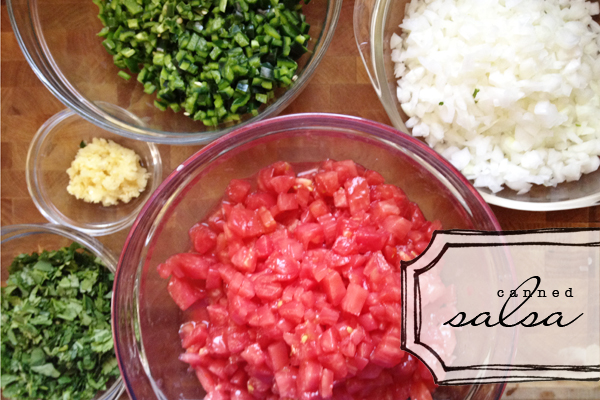
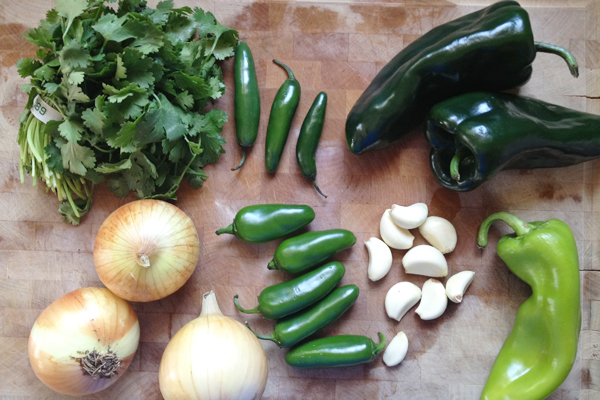
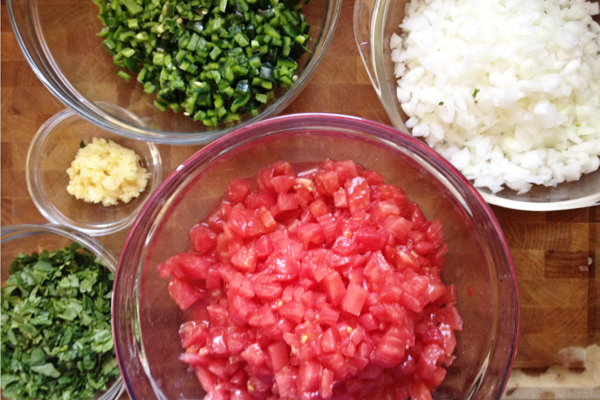
Next up was chopping all the tomatoes, peppers and other ingredients. Ideally, you would do all this with a food processor but I didn't have one at the time so I put my fancy, super sharp knife to work. 

pre-chopped ingredients for salsaingredients in canned salsa

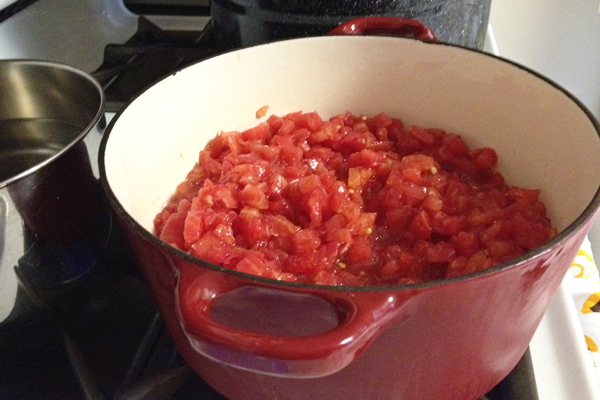
Once everything was chopped, it was time to cook. I started with the tomatoes first. 

tomatoes for canning salsa

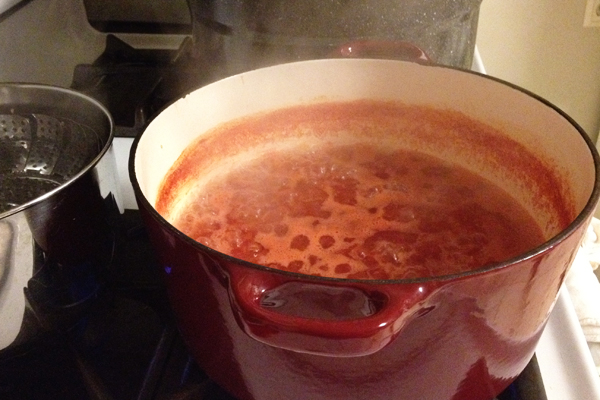
Cooked those down a bit before adding all the other stuff. 

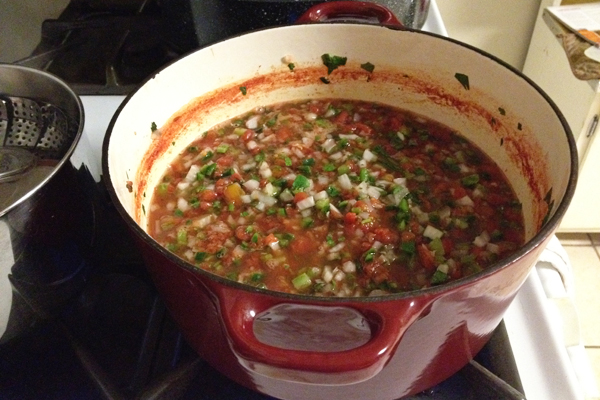
making garden fresh salsa for canningmaking garden fresh salsa for canning

Let it all come to a boil before ladeling it into the jars.

Let me pause here. Anyone know why it's called canning and not jarring? You don't use cans and I'm pretty sure the first people to "can" didn't use cans either. 

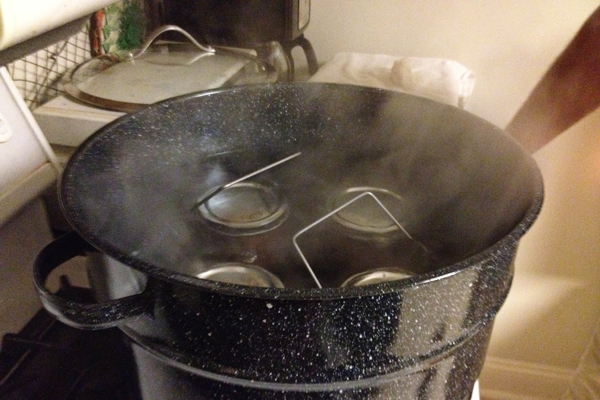
Anyway, there's a whole process in this that I won't bore you with but basically you have to have your jars heated so they don't break when you put in the hot salsa. Then all the jars go back in the water canner and "process" or continue cooking in boiling water for a certain amount of time. 

Canning homemade salsa

Then it's time to take them out and wait to hear the magical "pop" of the lid sealing. It's pretty awesome. 

 Canning homemade salsa

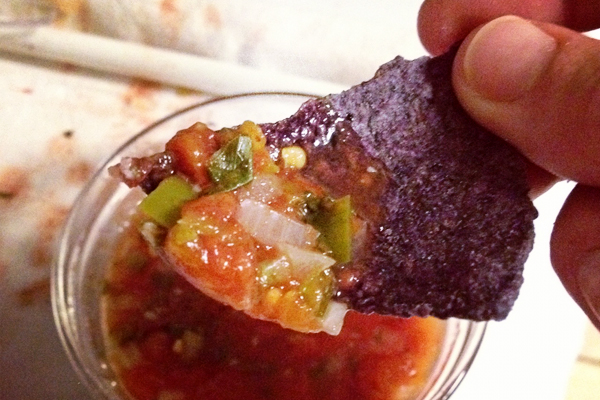
I must also say that I was a little more than disappointed at the amount of salsa 12 pounds of tomatoes made. I was hoping for a pantry full of garden salsa that I could eat on for years but I ended up with a few jars full. Oh well. We had some salsa that didn't fit in the jars so we had a taste test. The flavor was awesome but it just wasn't hot enough.

 Canned Garden Salsa

I'm always afraid to make things too hot and ruin it but I'm realizing that even if I double the amount of peppers a recipe calls for, it's still not hot enough. Better luck next time. As for the jars we do have, I have been adding chopped habenero peppers and letting it sit for a day before eating it and it's pretty perfect. 

So, what did I learn from my first adventure in canning? 

One, I need a food processor - which I know have thanks to a dear friend.

Two, I love blanching things!

Three, I should can on the weekend and not try to fit it in during nap time because there's just not enough time.

Four, I need to triple peppers when making salsa to meet my need for heat.

And, lastly, a personal cleaning assistant would be awesome because my kitchen looked like a crime scene with all the juice from working with 12 pounds of tomatoes scattered all over the place.

I don't have a recipe to share because I'm not 100% sold on my version but here's the one I used as a basis for mine: spicy tomato salsa, thanks, @theprairiehen. I just used more tomatoes and fresh peppers instead of dried.